Bear with me. It's not often I get to brag about stuff I've designed. I say "designed" because I figured it out, then got some AI help to fix the most esoteric (to me at any rate) problems that came up.
The widget at the foot of these articles.
You know it, this one:
Google didn't just give me a widget like that. I think maybe they just aren't the "Do No Evil" company they started out as ... 😸 But (and this is part of the reason why I pay so many online fees) I have a virtual server at Digital Pacific. I host one blog on there because I sometimes worry that Google will just close Blogger/Blogspot down as it has so many other of its properties.
First - Digital Pacific aren't giving me anything for this testimonial. I started with them almost twenty years ago, to host a small static website. Yes, they've been around for a long time. I also put several people onto one of their servers and set them up with websites. And when my old site wasn't needed any more, I closed it down and didn't use DP for a year or two, but then another use case came along, and I signed on again. And then again with the current site, O Hai Corona!
I've never had a problem that either I couldn't solve fairly easily or one that DP considered too trivial to give me their full support.
So Anyway.
As the site has a perfectly good webserver, I can use it to serve out content - and chunks of web code. That whole image above is a mini web page that (thanks to ChatGPT3.5 looking up the variables for me) grabs the URL of the blog post and puts it into the buttons so that you can share/copy/bookmark, it contains a whole little Universe of code and stuff, and that you can use to do whatever with.
To bung it into a blog article here, I have a little HTML template I just copy over an existing page, and that creates that little graphic up at the top of the page, and adds the code to display the Bitty Little Box down at the bottom of the page.
What's the beauty of that?
I can add the piece of HTML to display the BLB on the bottom of any post or web page and it'll consistently display the same way. And if something stops working or I want to add a new feature, I do it once in my DP server and it reflects in ALL the pages the code is in. So even old posts that had it in, can now see my "Contact Details" link I added at the bottom. If I use a different service to display the links, I only have to change it once on the DP server, and not have to worry about editing 900+ instances manually.
And it only took me a few weeks of refining and experimenting for n hour here and there to get it up and runnimg.
One other feature I like about it is that if I have an older post (which may not have had a BLB in the past) I can edit and update it with just that one piece of HTML and bongo - it now has the BLB and all that it contains.
Short post, I know, but now the BLB contains a contact details link so if you're interested you can contact me.
Starting shed automation. I know, it seems to be ass-backward to not be finished with physical moving-in stuff and already planning the improvements, but I have to plan, and also it was a bad bones day so hard physical exertion was out.
A propos of drawing circuits, I need a Windows app that I can use to easily draw up circuit diagrams to post in here, does anyone know of something that's free, able to have components added without needing a degree in CAD / CAM / Ballyhoo BS?
I'd just like to be able to quickly draw a box, add a few terminals to it and label the box and terminals, then use that in multiple drawings along with common components. (Or tell me one that isn't free and then help me out with a donation?)
Anyhow. The thing I want to turn into a black box is this AC current sensor thingie. You can find them on AliExpress for a few bucks and a five-week wait, and they're a bit super-easy, just power them from the same 5V as the board you're using to monitor (in the case of that link, an Arduino Uno but I have a few others in mind) and measure the Out voltage on an analog pin. If I was a smart-ass I'd add voltage sensing, then work out the total power draw of the workshop but I'm a dumb-ass and all I want is to trigger an action if more than an amp or two is drawn on the monitored line.
Why Automation?
This is the little gizmo in question, the ZMCT103C which will sense 5A, which I think is reasonable given the 700W - 1600W range of mains-powered tools I have. I'm not sure what the gizmo does with more current but I'm hoping it just silently maxes out and doesn't get blown up by a larger input voltage. We'll see. If desperate, I can actually wind myself a transformer and just make a circuit to switch at some predefined current.
If you want a ZMCT103C of your very own, a quic search of AliExpress will get you around a dozen hits, FSM knows how many more if you just type it into DuckDuckGo. (Or Google, not my recommended option though.)
But that doesn't get you to the "why" of the whole thing does it? Basically, it's simple. If a large enough device draws current and there's no voltage on the dust extraction, I want it to shut down until someone presses Reset. Dust extraction is paramount for me, wood dust from power sawing and routing is fine enough to go through a normal dust mask and play hell-high havoc with my respiratory issues. And when I turn on any such machine and the control board realises that there's power on the air/light circuit, then it should turn the dust extractor on. I'll try and arrange it so that all the dirtiest power tools have a suction hose on them, and a blast-gate that I can open to allow dust to be whooshed away and filtered so that I can get away with a relatively simple respirator.
Most workshops have these auto-on systems but they're built into the superduper shop vacs they buy, you have to plug the power tools into the shop vac and then it switches on when the tool is powered up. That's great for many smaller shops and hobby setups like mine, but as I said, my needs dictate something a bit better. Shop vacs produce a huge plume of 2u dust and that's just a limitation they have. They run high speed air, and that puts a lot of pressure on filters.
I want a lower-speed, high volume setup and I'm building it. Also, those shop vacs are inside the workshop so that means that whole dust plume is going right back into the air I'd be breathing. You can (sometimes...) run a vent hose outside from the shop vac but it costs because it reduces the overall efficiency and so you get less dust extraction.
Some of the low-speed high-volume dust extractor systems people use, also vent back inside the shop. Some have huge cylindrical folded-paper filters atop them but those filters only catch some of the dust in that dangerous size range, and even then, those filters cost a bomb, need cleaning (which need regular cleaning, generally with an air hose nozzle, and then there you are, shifting the dust out of the filter and into the air around you. Ya just can't win.)
The only thing you can do is take the best tips from it all and put the extractor outside - with all the filtering you can get - and be prepared for a few efficiency losses along the way. Because of course even the scenario where the machine is outside has drawbacks. For a start, it creates a vacuum inside the shop, and if the wind's in the right direction you can cop the dust right back. On cold days, the extractor system will cause that vacuum and then cold air will creep in through every gap.
And THAT is why I want automation. To be able to make the shop as clean as possible for my lungs' sake.
So some of the programming has just been sorted out:
If power tool on and no power to light / air circuit, emergency stop power to the tools. If power tool on and power exists to light / air then activate dust extraction. If dust extraction is on as per above, and pwer tool turns off, countdown 30 seconds and turn extraction off. (You want time for the dust in the lines to get to the cyclone, also sometimes you're just moving a length of wood along to make the next cut, so turning the extraction system on then off then on again is wasteful.)
The other thing is that I want to run the dust extraction off solar and an inverter, because even though it seems a negligible current, with the mitre saw turning on and the extraction system turning on, that could trip the circuit breaker for the garage. There's only a single 16A circuit into the place, meaning that in practice it's limited to 10A per outlet which means that two motors kicking in at the same time could easily exceed the 16A rating.
For the moment I'll have to chance it - or power the extraction system from the laundry which is on a different circuit and circuit breaker. A new battery for the solar panel and a chunky 4000W inverter are outside the budget for now. But I want to allow for it in future.
Anyway - just a progress report. As always, please share the link to this page, consider making a donation, and come back soon for the next article!
Firstly, I'm trying out a "drop cap" style graphic at the head of each article that'll allow you to tell which blog the repost came from when it's announced on social media. If you find this annoying let me know, but give it a few days to see how it goes...
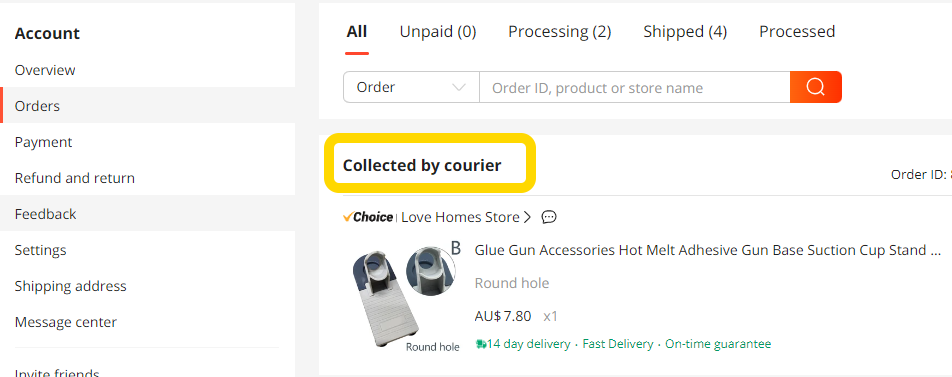
Now on with the show. I see that AliExpress has made order tracking that little bit better, I've never seen:
. . . tracking info start with "Collected by courier" on any of my other orders, there's always been a longish hiatus where the order was packed but - invisible - just not tackable.
Sometimes that Cloak Of Invisibility lasted right up to the day the item was received here in Australia, sometimes I'd get a grudging email after two weeks that the order was in the system with China Post or something.
Anyone else noticed this as a new thing or have I just never had a seller that bothers to use the feature?
Firstly, I'm trying out a "drop cap" style graphic at the head of each article that'll allow you to tell which blog the repost came from when it's announced on social media. If you find this annoying let me know, but give it a few days to see how it goes...
So you may have gathered across all my blogs (check them all at Ted's News Stand) that real life has reared its head in our life here, but it's also started settling into a new routine so besides having more time to be indoors and writing, I also have more time to go back to making a garage into a workshop.
To complicate matters, it's coming up on our hottest months and the garage is a 6m by 6m steel sheeted and roofed structure without a tree in sight to shade it. When temperatures outside hits 26C the interior (with a door open and fans blowing cooler outside air in) hits 33-34C. And we're heading for the middle of summer, when temperatures outside will hit 34C - 38C quite often...
UPDATE: Thanks to the skylight blinds the difference between inside and out is now only 6C with door open and 4C with door open and intake fan on...
I guess I could open the garage roller door.
.
But no. I can't.
.
Our cats are confined to the house and yard - and that means they can get into the garage by its side door. Which they do all the time because they're all of them my apprentices and like to be around when I'm working on projects. (At least, right up until I make those big noises with the machines, then they sensibly go outside and observe from a safe distance...)
Eventually, I'll make a folding screen to stop them running out and onto the highway, but that will take time and frankly, after the most recent bit of work I've completed, I can't see myself doing a large folding screen this summer. Thanks to what I've done the garage is already a little cooler inside, but if I'm going to lose another couple of kilos in the "tin sauna" I'll use that energy to finish moving in rather than improving the airflow. It'll be cooler again soon enough, and then too cold without a heater Also, besides hot work, it's hard going with respiratory and mobility issues.
I do okay, I just do okay slower than most others would...
For now, I might have to be content with the goals I've already scored:
Sunshades covering the wall-to-wall set of skylight panels.
Tool trolley (almost) finished.
Shopvac turned into a cyclone dust collector.
Sunshades
I noticed early on that the skylight panels (just a 40cm wide strip of translucent corrugated panels in the roof, but provide great light - and unfortunately, heat) made the place uncomfortably warm in spring, and put an old cloth gazebo wall panel up temporarily over the western side, as I figured the afternoon heat would be the worst. Then Pickle.
So what happened? I had the panel clipped up with spring clips, Pickle found his way up onto the shelving, decided that he was going to use the canvas for a hammock, walked out onto it and - took an almost 1.7m drop to the concrete below... Luckily the clips only let go on one side and the cloth wrapped around him and slowed his fall, because I could only watch as he came down, it was all so quick. The tube chute he ended up sliding through was enough to reduce his fall from a possible thump to a mild bump, and he's okay.
But that meant that I had to take time off the main setting-up jobs to make sure that Pickle didn't get to the top of the rack shelving again. (Closing any direct climbways above the first shelf, a minor engineering miracle.) And put up the canvas again because otherwise it was uncomfortably hot inside.
The old...
Halfway to the "new, improved" shades...
... and I don't have a photo yet of the whole new setup.
Then just a week or two ago I took the gazebo canvas down, cut two correctly sized panels from it, and covered a bit more than a metre of the skylights either side of the ridge. They're designed to more or less stay there all the time but can be furled up towards the c entre to let more light and warmth in, in winter.
I installed two support wires that go from side to side over the ridge rafter spaced about 900mm apart, used a few steel tubes from another gazebo structure to make spreaders for the canvas, and fixed the panels in place on the support wires. Because I had a pack of tarpaulin grommets, I added two to each canvas panel so I can also support the middle of each panel.
I'd earlier bought a 1.8m x 1.8m 70% shadecloth swatch of a similar sandy tan colour that I could cut in half for two 900mm x 1.8m panels, put four grommets per side on those, made similar spreader bars, and ran them from the end of the tarp to the walls. That gives about 90% shade over the apex of the roof and 75% for the ends, and I can slide the spreader bars up to open it all up for winter, slide them back down for hotter days.
Tool trolley
This was my hardware cart in the smaller shed, but I've made it the storage for power tools, hand tools, and a few other bits n bobs. I need to extend a pair of steadying bars and move the rear caster wheels outwards for a bit of extra stability, but most of the tools are on it somewhere. It ain't pretty but it's functional.
Shopvac cyclone
I've had an 80litre olive drum on a cart made from an old pram frame for months, and a spot to sit the Shopvac at the front. But I hadn't yet had time to make the plumbing and set up a drum cyclone.
But then I had a half day to mess around, got things halfway to a prototype that I thought would work, and when I had another half day, I put it together. It too ain't pretty but it does keep all the dust out of the shopvac, meaning I can use it to dust-collect on the power tool tables and also vac up the floor, without needing to buy filter after filter for the Homelite shopvac. It has one downside though, I managed to block the end of the hose while it was running and was treated to the sight of the olive barrel just imploding like a bad science experiment. And it was loud, decisive, and FAST! I changed my underwear and continued.
Luckily the decades-old plastic didn't split, but I'm now looking for a much more sturdy barrel... Meanwhile, I have a smaller shopvac style machine that I use for floors or anywhere there's a chance of water or something that could block the hose and cause another implosion, and just the cyclone for the dust ports on the mitre saw, drill press, table saw, and any other power tools with a port. Being on the trolley I can move the dust collector to wherever it's needed.
There's also a continually running air cleaner filter, and I wear a mask when using the machines as well.
NEWS!:I found a large extractor vent/motor combo. Backstory:
Now, people who make their own dust extraction systems often make the turbine rotor turbine for it out of plywood and attach a motor and build a spiral exhaust chamber etc... The idea of such a turbine is that it moves a large volume of air at a lower pressure.
But it's a LOT of fiddly work that could explode on you if anything lets go and unbalances it at 5,000 or 10,000RPM or whatever. Good turbine or squirrelcage blowers are kinda expensive on my budget. And I saw this vent motor combo in the opp shop for twenty bucks and thought "Well, this'll save me making and balancing a fiddly turbine, and I have several old mains motors that' spin this up to the speed I'll need..."
Then I cleaned it up a bit, and on a whim, sorted the wiring out, hooked it up to an RCB and gave the "ole Beige Mario Mushroom" a quick test to see if the turbine impeller was balanced before investing much time in adapting it to a more powerful motor. I needn't have worried...
My wife took the first video of it but I had to take a second one because she was --- shall we say very VERY surprised by the speed and volume of air it shifted and let out a few unladylike words... Quite frankly, so did I, because the amount of air it shifted for such a small power consumption took me by surprise. So here's Take#2:
The dome is about 420mm across, enjoy the rush!
You can find my other videos at https://youtube.com/@PTEC3D. Warning, I don't edit my snippets (yet) so it's all raw footage. And a bonus, boring, non-trained voice.
Bonus: The mitre saw
You might recall that I bought the 254mm compound mitre saw a few months back at a garage sale, and put it into service as soon as I lowered the height of the plinth it was on, and I've been using it for the soft woods of pallets and the pine lumber I have and it was fine.
Then I tried a piece of harder wood and noticed that the blade was getting smoking hot. Not good, so I checked a few things. Including the blade. - Wow... - The blade that had 13 of the 40 carbide tipped points broken off, chipped, or otherwise damaged...
(Not by me, I might add. I knowingly used it to cut aluminium T track but the saw blades are made for that, just use a slow feed rate and a mitre saw will rip through anything aluminium, plexiglass and many plastics. Nope - I was just a dope and didn't check the blade when I found it at the garage sale and so missed an chance to maybe whittle the price down a bit more... Lesson learned.)
I had a bit of money put aside and luckily it was enough for me to go to the hardware store and buy another blade for the beastie and still have server fees etc t hand. Haven't made a cut with it yet but I'm sure it won't have as much tear-out as the old blade had... UPDATE: It's lovely to use now. I've just made around a dozen rails for the last (The LAST!!! Hurray!!!) part of the shelving and it's like magic.
As it's now our height of summer it's a bit warmish (36-42C, about 97-108F) to be working out there doing heavy work like finishing the rack shelving and moving large quantities of stuff around, but there are smaller projects:
The "new-new "dust extractor system. I made the cyclone system I mentioned and that I'm quite proud of out of a shop vac and an 80litre plastic olive drum, which is fine except it depends on high-speed rather than of volume of air so it screams a bit loud, which is annoying and also, high-speed air stirs up a lot of dust. The new-new system will use a 120litre drum for the cyclone, and whatever I find works for the second and third stage filtering and power plant. (Or in this case, power mushroom...)
I'm also working a 200litre drum into a plastics washing machine, currently making the mesh insert that the plastics will go into to be washed. (BONUS: It'll also let me wash other things, as long as they're not oily.)
Re-jig of the tiny table saw (or finding a cheap one on local buy/swap/sell and having generous patrons) so that I can finally be sure my badly racking home-brewed fence will remain square - or finally free up that table for use as a router table.
I need to make any draw of current on the power tools outlets, switch on the dust extraction and then keep it running long enough to clear out the plumbing afterwards.
I need a way to cut off ALL power tools power for emergencies.
I'll be getting back to designing my little CNC router so that I'll have some wood, plastic, and aluminium milling capability.
Still looking for someone to send me a Bambulabs machine 😺 so I can print parts for tools etc without having to futz and fart around with my cranky, fussy, and now ageing Creality Ender 3 Pro. It's still a good printer but takes a lot of setup, has to be watched while printing, and I just don't have that amount of time.
Thicknesser, anyone? I could really use that or an electric planer for taking plastic sheets to a smooth finish rather than clogging up expensive sanding discs as I'm currently doing...
I have - of course - the rack shelving to finish and move stuff into. But - LAST row of shelves!
And to build a lean-to roof with solar panels on top and a long wood rack underneath, and a water collecting drum for shop water seeing as running water isn't handy close by.
I need to make a cat-containment set of folding panels so that next summer I'll be able to partially raise the garage door to let air in but filter our cats that would otherwise escape and get run over on a highway 20 metres away.
I'm also going to need to partition off a space for the wife's little scooter so it can stay undercover but not get workshop dust all over it.
If I can finagle it I'll ask the landlord to please let me cut a utilities panel in one wall where I can place the dust extractor outside and only run plumbing and a power lead inside.
If I can achieve that last point, then in winter I can use the same extractor utilities panel to run diesel heater combustion pipes outside for winter heating.
And at some stage of course, I'll want to be making useful items out of waste plastic including waterproof capping and cladding for my bird, bat, and possum nesting and roosting boxes. Oh and I have half a dozen orders from my wife that I'd really like to have the facilities to Make for her...
Now please bookmark, share, donate - help me get some of these projects ready to hand off to worthy community organisations.
The great news is that we' ve heard a great new word from the wife's hematologist: remission!